
Let's Build A House:
You think you can't build a house, but you can! There's four different houses here to choose from.
You think you can't build a house, but you can! There's four different houses here to choose from.
Cardboard House:
Supplies:
*Cardboard box (any size/any style)
*Cardboard scraps
*Scissors
*XACTO Knife
*Tape (clear)
*Glue
*Paper (scrapbook, magazine, gift wrap, plain, coloured, etc.)
*Miniature items
*Fabric (or moss or carpet or twigs, etc.)
Directions:
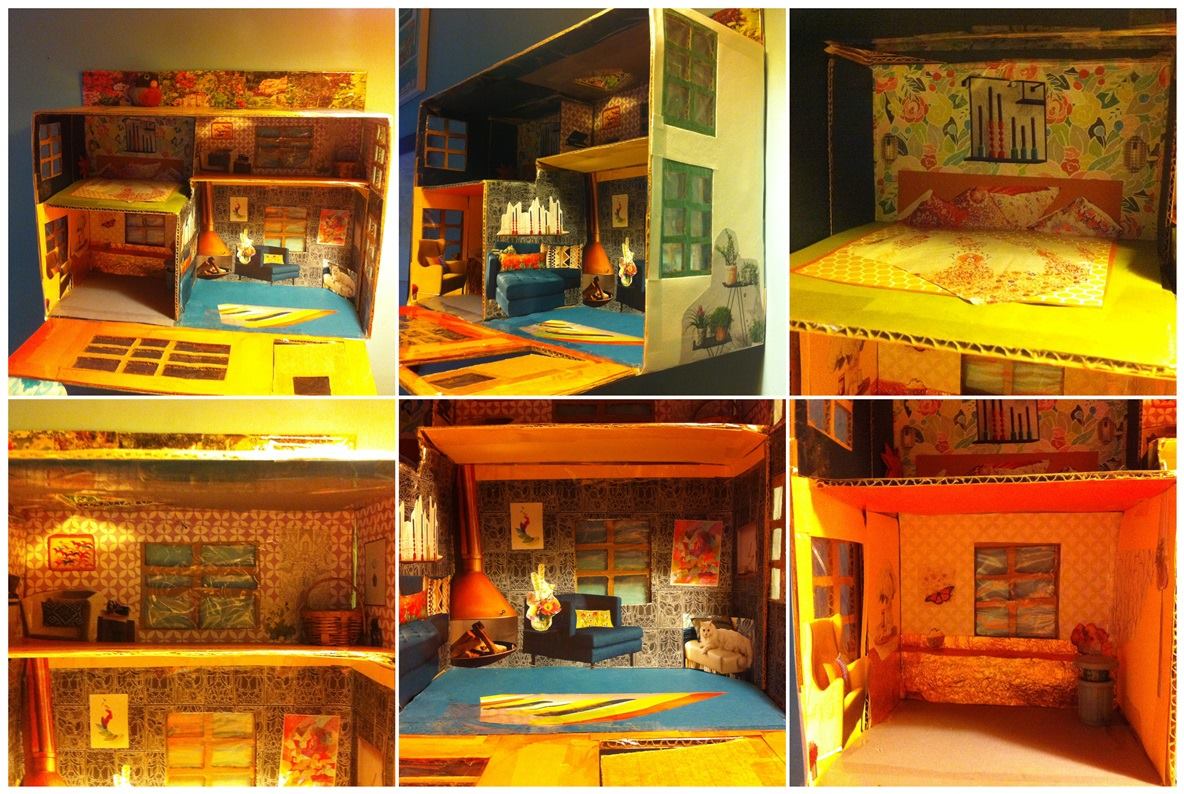
You can build an entire house or simply one room. This can be on any scale you wish - from 3" x 3" to something your kid could actually go inside of & play (though when using cardboard, limit this to a one level house y'all).
House: Determine if your house will close or be completely open in the front. Do you lift the top off? Does a flap open down from the top? Do flaps open in the middle out towards the sides? This will help you configure how you cut your box.
Figure out rooms: How many levels? How many walls? Use the cardboard scraps for floor levels and walls. Hot glue or tape into place. Need stairs? (You don't have to have stairs). Use a cardboard scrap to fold in zig-zag formation to make stairs. Attach to bottom & top level.
Set floors & walls: Use anything you like (paint, papers, fabric remnants, decorative moss, strips of bark, carpeting - it doesn't have to be official doll house items) & paint the walls & floors, or tape papers, or hot glue other items as your wall & floor coverings.
Create windows & doors: Once you know your levels and rooms, you can decide where to put a front or back door (if you wish & you don't need interior doors, unless you just want them) or where to put the windows. The windows can open like shutters (either one whole piece of cardboard opening to one side or two pieces that open from the middle towards either side), you can have mullioned windows (that's what I had, it's a lot of work) or a simple hole. You can cover in tape on the inside & outside (or clear/see through coloured gift wrap, velum, transparency sheets, saran wrap, etc. to be your glass. You can even create stained glass with coloured saran wrap or gift wrap or create your own with transparency sheet or clear cling wrap or velum (with markers) and then afix to the window opening.
Decorate: Use anything you have on hand (you do not need to purchase official doll house furniture items). You can pull from what your kids already have in miniature form, or perhaps you have left over doll house pieces from when you were a kid. Perhaps you found some at a yard sale. Perhaps there are other miniature items that can suffice for furniture & fixtures.
Don't have anything? You can make everything! You can use foam & fabric with hot glue to make cushiony things. You can wood glue small twigs together. You can use cardboard to create anything from a bed frame to a fridge to a sofa & then either cover it in paper or paint or fabric. You can use magazine clippings to create art on the walls or even create your own art for the house.
Lighting: I can't instruct you on how to actually electrify your little cardboard house, however you can pick up those miniature, battery operated strands of twinkle lights or use electric tea lights to add lighting to your little house.
Single Room: Simply choose a size box for your one room diorama. Create your door or windows, create your walls and floor, decorate, & light it. You'll use the same process as for the entire house listed above (or however you might creatively work out your own ideas), simply focusing on the one room instead of an entire house.
Notes:
Just have fun with it, get creative, build it for your own pleasure or for your kids to play with, build it with your kids. It can be as simple or fancy as you like; you can use anything from your own backyard, your house, or purchase things if you're so incline. You can create anything on a simple or grand scale. It's your house. Create the one you've always dreamed of.
If you want to hand sew little pillows and bed sheets, knock yourself out. If you want to create the home from twigs & moss go ahead (I think wood glue would work and use string to keep it together while it dries - perhaps strips of bark for the roof - pebbles for the foundation even? I'd use super glue for the pebbles & I'd actually purchase decorative moss instead of using real, but you can find lichen & oak moss when limbs fall & those would be great decorative elements for a house like this). You can make gnome homes, alien structures, a pool cabana for Barbie, your perfect kitchen to hang inside your own kitchen (or just recreate your own kitchen in miniature!), a little doll house for your kid or yourself. The sky's the limit.
You can even purchase a pre-made papier-mâché house like this, or even find a DIY on how to make one. The Sister purchased one of these & created a little house, which you can see in her photo below.
*Cardboard box (any size/any style)
*Cardboard scraps
*Scissors
*XACTO Knife
*Tape (clear)
*Glue
*Paper (scrapbook, magazine, gift wrap, plain, coloured, etc.)
*Miniature items
*Fabric (or moss or carpet or twigs, etc.)
Directions:
You can build an entire house or simply one room. This can be on any scale you wish - from 3" x 3" to something your kid could actually go inside of & play (though when using cardboard, limit this to a one level house y'all).
House: Determine if your house will close or be completely open in the front. Do you lift the top off? Does a flap open down from the top? Do flaps open in the middle out towards the sides? This will help you configure how you cut your box.
Figure out rooms: How many levels? How many walls? Use the cardboard scraps for floor levels and walls. Hot glue or tape into place. Need stairs? (You don't have to have stairs). Use a cardboard scrap to fold in zig-zag formation to make stairs. Attach to bottom & top level.
Set floors & walls: Use anything you like (paint, papers, fabric remnants, decorative moss, strips of bark, carpeting - it doesn't have to be official doll house items) & paint the walls & floors, or tape papers, or hot glue other items as your wall & floor coverings.
Create windows & doors: Once you know your levels and rooms, you can decide where to put a front or back door (if you wish & you don't need interior doors, unless you just want them) or where to put the windows. The windows can open like shutters (either one whole piece of cardboard opening to one side or two pieces that open from the middle towards either side), you can have mullioned windows (that's what I had, it's a lot of work) or a simple hole. You can cover in tape on the inside & outside (or clear/see through coloured gift wrap, velum, transparency sheets, saran wrap, etc. to be your glass. You can even create stained glass with coloured saran wrap or gift wrap or create your own with transparency sheet or clear cling wrap or velum (with markers) and then afix to the window opening.
Decorate: Use anything you have on hand (you do not need to purchase official doll house furniture items). You can pull from what your kids already have in miniature form, or perhaps you have left over doll house pieces from when you were a kid. Perhaps you found some at a yard sale. Perhaps there are other miniature items that can suffice for furniture & fixtures.
Don't have anything? You can make everything! You can use foam & fabric with hot glue to make cushiony things. You can wood glue small twigs together. You can use cardboard to create anything from a bed frame to a fridge to a sofa & then either cover it in paper or paint or fabric. You can use magazine clippings to create art on the walls or even create your own art for the house.
Lighting: I can't instruct you on how to actually electrify your little cardboard house, however you can pick up those miniature, battery operated strands of twinkle lights or use electric tea lights to add lighting to your little house.
Single Room: Simply choose a size box for your one room diorama. Create your door or windows, create your walls and floor, decorate, & light it. You'll use the same process as for the entire house listed above (or however you might creatively work out your own ideas), simply focusing on the one room instead of an entire house.
Notes:
Just have fun with it, get creative, build it for your own pleasure or for your kids to play with, build it with your kids. It can be as simple or fancy as you like; you can use anything from your own backyard, your house, or purchase things if you're so incline. You can create anything on a simple or grand scale. It's your house. Create the one you've always dreamed of.
If you want to hand sew little pillows and bed sheets, knock yourself out. If you want to create the home from twigs & moss go ahead (I think wood glue would work and use string to keep it together while it dries - perhaps strips of bark for the roof - pebbles for the foundation even? I'd use super glue for the pebbles & I'd actually purchase decorative moss instead of using real, but you can find lichen & oak moss when limbs fall & those would be great decorative elements for a house like this). You can make gnome homes, alien structures, a pool cabana for Barbie, your perfect kitchen to hang inside your own kitchen (or just recreate your own kitchen in miniature!), a little doll house for your kid or yourself. The sky's the limit.
You can even purchase a pre-made papier-mâché house like this, or even find a DIY on how to make one. The Sister purchased one of these & created a little house, which you can see in her photo below.

Nativity or Holiday Scene:
|
|
Supplies:
*Nativity structure
*Figures
*Decorations
Directions:
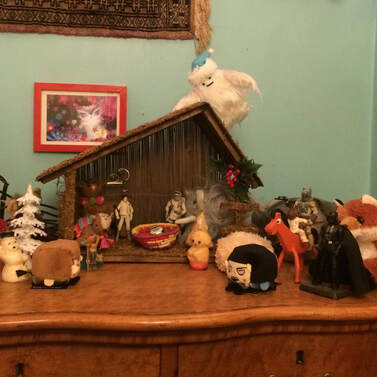
Use a pre-made Nativity structure or make one from cardboard or twigs (see above section). Add anything you like for decorations of figures, or make your own!
Notes:
Now I'm not very religious, but I don't think that should preclude one from having a nativity if that's something they want. Purchasing a nativity set can be expensive. I have fond memories of the one my mom had while I was growing up. I tried using the structure, but not the people, but my mom wanted it set up like it was always set up. A family friend recently gave me a structure (pictured above) & I simply used the things I had to fill in the characters.
This is not meant to be disrespectful, but to show that you don't have to spend a lot of money to have a nativity, if a nativity is what you want. You can even just build a structure and decorated with figures you have & it can be any scene (a winter scene, Halloween, let's travel the world, Mardi Gras). It doesn't matter. You want a scene, I'm letting you know that you can create one in any way that you wish.
I actually do set up a Nativity and regulate which figures to portray which characters. I actually ask my ju-ju's which parts they want to play, like I'm setting up a Living Nativity. "Ok, who wants to be Mary? Who wants to be a shepherd? Who wants to play Baby Jesus? No, Wooly Mammoth, you're too big to play Baby Jesus. You want to be Joseph though?" (I don't think my ju-ju's talk, it's just fun to play act it all out.
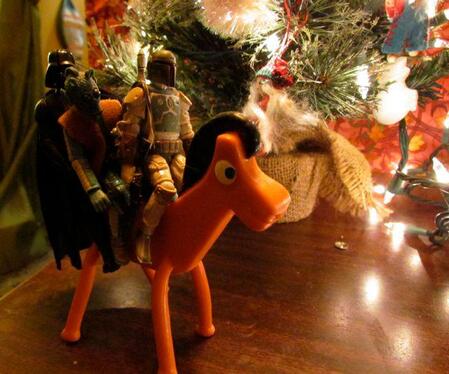
The second photo? Well, the Nativity wouldn't be complete without the Three Wise Men nearby en route, would it?
*Nativity structure
*Figures
*Decorations
Directions:
Use a pre-made Nativity structure or make one from cardboard or twigs (see above section). Add anything you like for decorations of figures, or make your own!
Notes:
Now I'm not very religious, but I don't think that should preclude one from having a nativity if that's something they want. Purchasing a nativity set can be expensive. I have fond memories of the one my mom had while I was growing up. I tried using the structure, but not the people, but my mom wanted it set up like it was always set up. A family friend recently gave me a structure (pictured above) & I simply used the things I had to fill in the characters.
This is not meant to be disrespectful, but to show that you don't have to spend a lot of money to have a nativity, if a nativity is what you want. You can even just build a structure and decorated with figures you have & it can be any scene (a winter scene, Halloween, let's travel the world, Mardi Gras). It doesn't matter. You want a scene, I'm letting you know that you can create one in any way that you wish.
I actually do set up a Nativity and regulate which figures to portray which characters. I actually ask my ju-ju's which parts they want to play, like I'm setting up a Living Nativity. "Ok, who wants to be Mary? Who wants to be a shepherd? Who wants to play Baby Jesus? No, Wooly Mammoth, you're too big to play Baby Jesus. You want to be Joseph though?" (I don't think my ju-ju's talk, it's just fun to play act it all out.
The second photo? Well, the Nativity wouldn't be complete without the Three Wise Men nearby en route, would it?
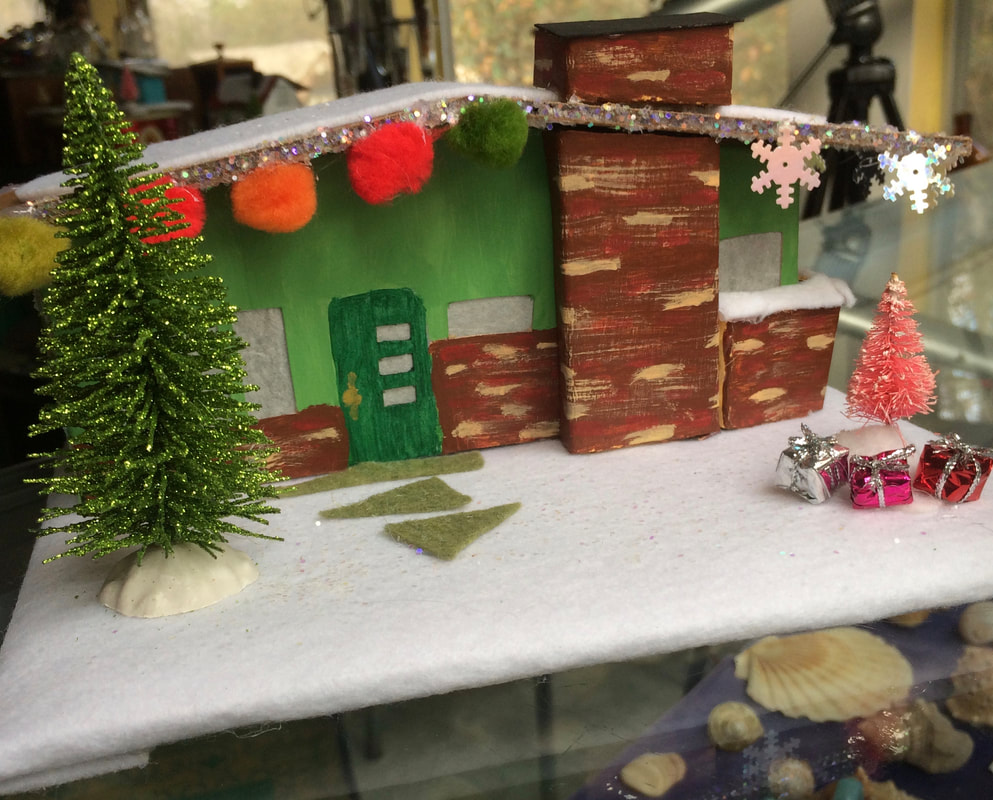
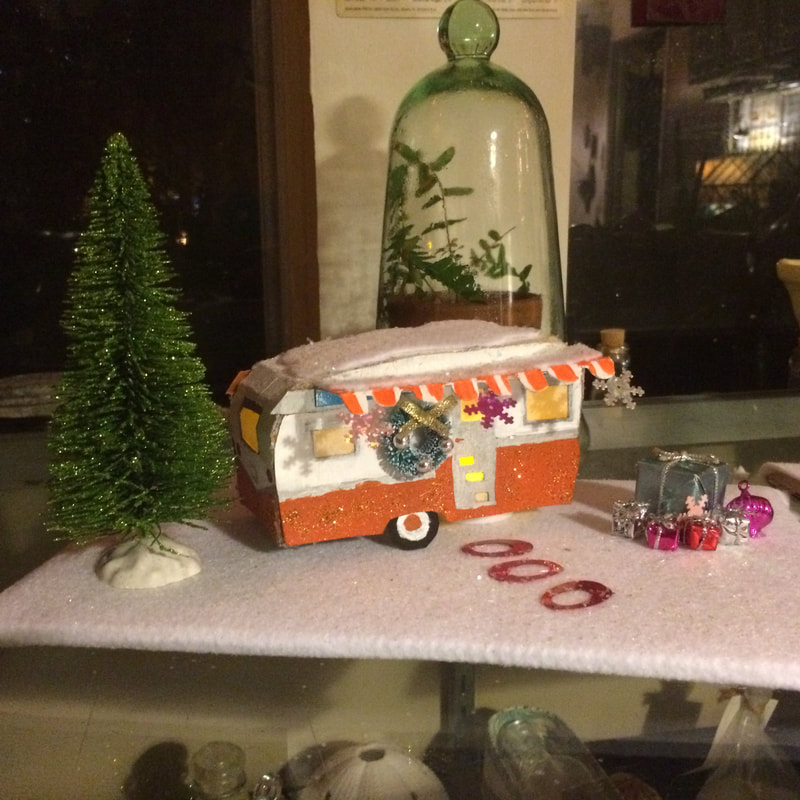
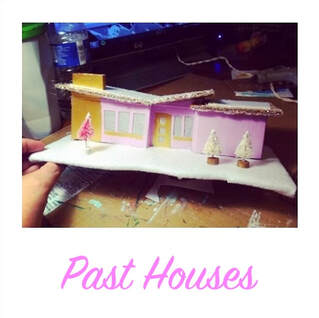
Putz Houses:
|
|
|
General Supplies:
*Pattern
*Heavy Cardboard
*Light Cardboard
*Hot Glue
*Scissors
*Xacto Knife
*Paint
*Tissue Paper (or vellum)
*Felt
*Glitter
*Decorations
Notes:
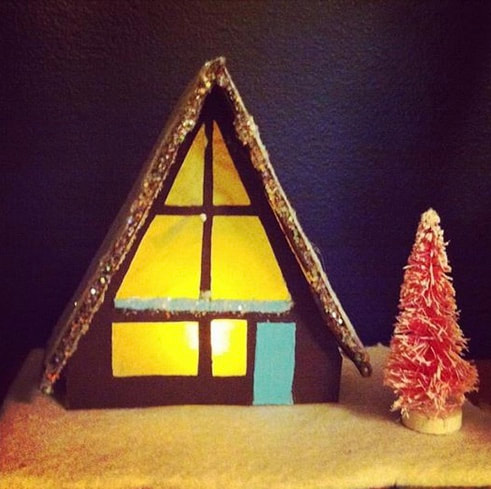
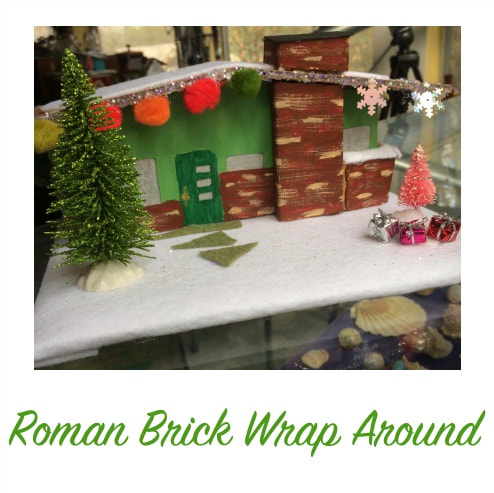
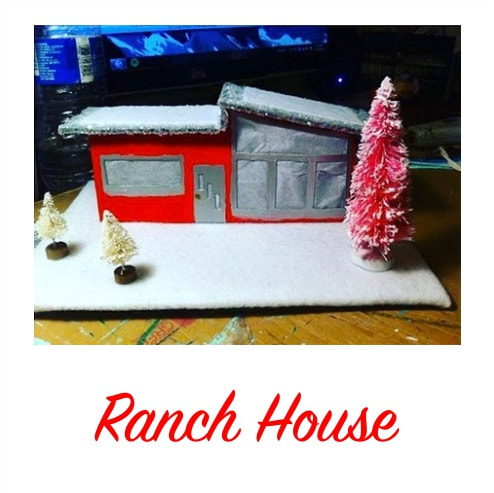
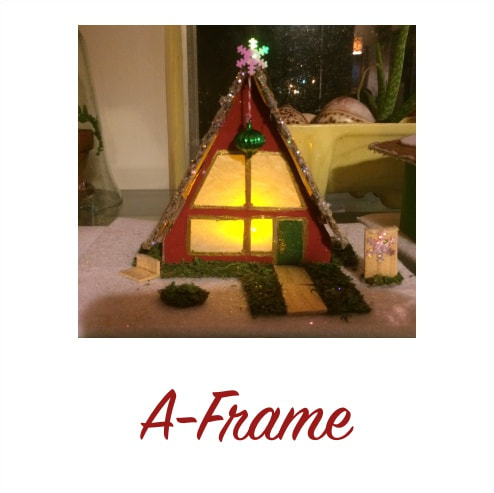
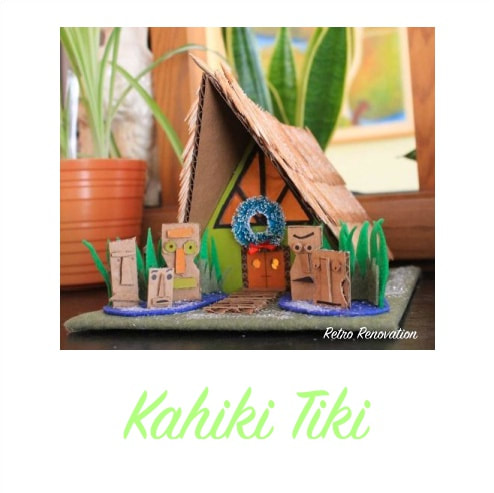
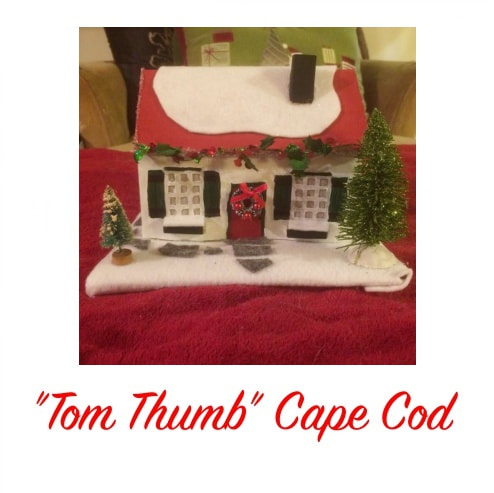
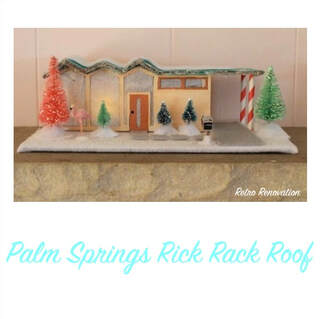
I found these patterns on the website Retro Renovation three years ago. They've gotten rid of some house designs that I had made & might possibly do away with the section all together as they haven't created a new pattern in two years. The pictures below will take you to my corresponding pages dedicated to creating each house (for perpetuity), with complete instructions. There will be a link to the appropriate pages on Retro Renovation.
These are not difficult little houses to make, but they are a little time consuming. They are not meant to be absolute perfection, but when I chose to teach an art lesson on these, I found that the participants (my friends) were all rather precision oriented & it took a lot longer for them than for myself. So if you are precision oriented, it will take more time than what I'll tell you that it took me.
These are really, really fun to make though & even kids can make them. So I definitely recommend them.
*Pattern
*Heavy Cardboard
*Light Cardboard
*Hot Glue
*Scissors
*Xacto Knife
*Paint
*Tissue Paper (or vellum)
*Felt
*Glitter
*Decorations
Notes:
I found these patterns on the website Retro Renovation three years ago. They've gotten rid of some house designs that I had made & might possibly do away with the section all together as they haven't created a new pattern in two years. The pictures below will take you to my corresponding pages dedicated to creating each house (for perpetuity), with complete instructions. There will be a link to the appropriate pages on Retro Renovation.
These are not difficult little houses to make, but they are a little time consuming. They are not meant to be absolute perfection, but when I chose to teach an art lesson on these, I found that the participants (my friends) were all rather precision oriented & it took a lot longer for them than for myself. So if you are precision oriented, it will take more time than what I'll tell you that it took me.
These are really, really fun to make though & even kids can make them. So I definitely recommend them.
|

|
|
|
|
