
Let's Make Creatures!:
I have three different types I've made. All are fairly easy enough for kids or adults alike. Let's get started, shall we?
I have three different types I've made. All are fairly easy enough for kids or adults alike. Let's get started, shall we?
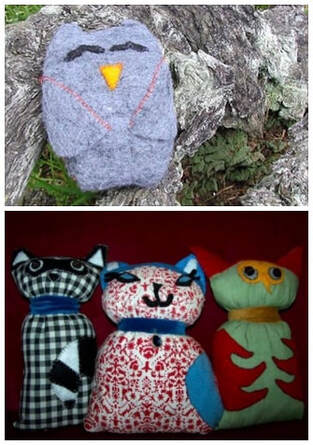
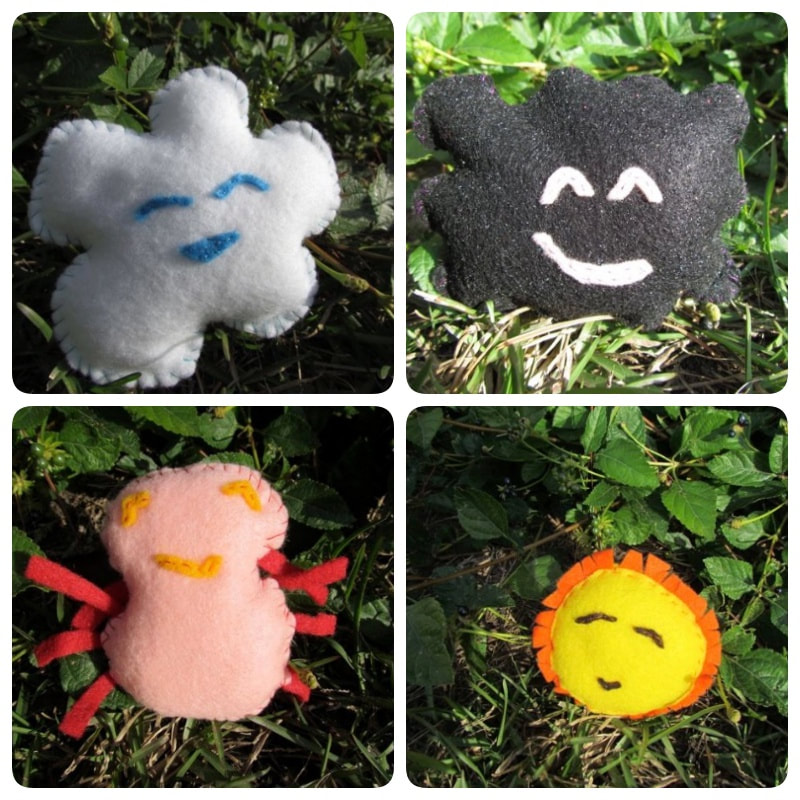
Plushies:
|
|
Supplies:
*Felt
*Fabric
*Button
*Sewing needle & thread
*Poly-fill
Directions:
Come up with an idea of what you wish to make (or look at your scraps & figure out what they look like to you). It's the same principles here as for the flat felt ornaments, but you'll definitely be stuffing these. Choose either fabric or felt and sew the facial features (or tail or wings or button eyes) on, then attach from piece to back piece, leaving a 1 - 2 inch gap near the end & fill with stuffing. Then sew up completely.
Notes:
I don't use patterns, so I have none to supply. You can go pattern free too, or simply draw the simple outline of what you wish to make on paper, cut that out, lay it on the fabric, then cut the fabric out. Do this for extra bits as well. Though I enjoy hand sewing and am good at it, I don't really know how to sew. As in, I just figured bits out from random places & put that knowledge together. A proficiently taught sewer will probably tell you my methods are incorrect for the items that I'm creating. I can tell you how I hand sew, but if you'd rather, there are plenty of tutorials online (or books at your local library) that can help you out.
Goo & Prickle:
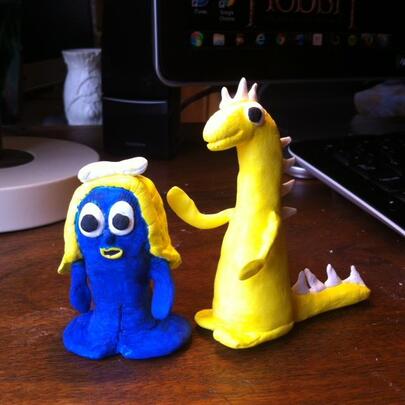
Supplies:
*Air dry modeling compound
*Markers
Directions:
Choose figure(s) that you wish to make. Roll modeling compound into desired shapes. Attach body parts, hair, eyes, etc. by pressing to body form gently. Allow to air dry completely. Colour figure with markers.
Notes:
Obviously if you're not a fan of Gumby & Friends, then you're not going to want to create them. But you can create anyone that you wish (or anything). This came from a need, or want, rather. I wanted ju-ju's of Goo & Prickle (my absolutely favourites), to go along with my Gumby & Pokey. I couldn't find them, so, I made my own.
These aren't good for rough play, so if you make figures for your kids (or if they make them), they won't last, but you can always remake. These are great for filling in your nerdy collection if you're limited on funds or things just aren't available. They're also great if you need items or figures for one of the houses I know you're going to want to build.
Also, this needs to be a modeling compound, that's reusable or air dry, not made of clay, & it's lightweight. Air dry clay will crack & crumble; pieces will break off after awhile (that's with the figures just sitting around). This is rather sturdy. Crayola Model Magic is the main brand, but there are other brands that sell a similar item. Goo & Prickle were made with the Creativity brand from Michael's. And any markers will do. I used Crayola markers, so they don't have to be fancy.
Pet Rock:
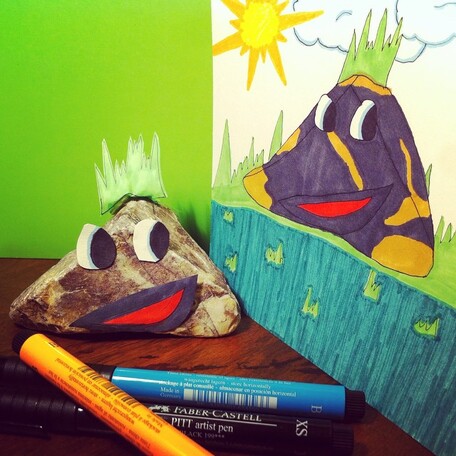
Supplies:
*A Rock
*Features for face
*Ideas
*Imagination
*Camera
Directions:
The easy part is creating your pet rock. Find a rock you like (can be one you already own or one you find in the wild), give it facial features (which you can draw & tape on as I did, or you can purchase googly eyes, use pipe cleaner for the mouth, use moss for the hair) - create your pet rock anyway you wish. It's also important to give them a name.
Now you have a pet rock, but what do you do with them? Give them adventures, of course! You can create your own adventures or you can use the prompt list supplied here (& see my own pet rocks adventures!) Get creative with the scenes of their adventures & then take pictures for yourself... or the world!
Notes:
I suggest tape, because I couldn't, personally, use glue on a rock, making the features stick for ever. It seemed wrong somehow, plus, if you just use tape, you can re-arrange your pet rocks face for various expressions (click the prompt list link above for photos). And if you use the fun prompt list, don't stop there! You can have loads more adventures with your pet rock.
